I was really excited about making some traditional Venetian dishes and I spent most of last weekend, when I wasn't watching DVDs or blogging, preparing three Venetian meals, which I want to share with you below.
To compliment the three meals, I also went the extra mile to get some authentic Italian ingredients. There's a really lovely shop in Marylebone,
La Fromagerie, that stocks all kinds of regional European wines and cheeses, so I stopped off on my way from work, one day last week, to hunt down some Venetian cheese and wine. Okay, it's a little bit pricey, but worth it, if you want to taste authentic Venetian ingredients.
 |
| Asiago and Ciabatta |
For the cheese, I chose a sample of Asiago. Probably the most famous Venetian cheese, it's a D.O.P. (
Denominazione di Origine Protetta) and I got fresh Asiago, rather than mature, as I wanted to eat it with bread. I also bought a fairly expensive bottle of Valpolicella, Villa Spinosa Classico Superiore from 2005. To go with the cheese, I bought a delicious Ciabatta in Waitrose and a cheap bottle of Soave, a Venetian white wine, which I used in my cooking.
Spaghetti alle Vongole
The first dish I prepared, on Saturday night, was a very traditional
Spaghetti alle Vongole - the
vongole in my case being some
capesante (scallops) which I had in my freezer (I was being a bit economical with Saturday's meal!). I also threw in some
Gamberi (prawns) for good measure. The other ingredients included:
 |
| Ingredients |
Olio d'oliva extra vergine Extra Virgin Olive Oil
Prezzemolo Parsley
Spaghetti
4 spicchi di aglio 4 garlic cloves
2 scalogni 2 shallots
Burro non salato Unsalted butter
Peperoncino in polvere Chilli powder
Vino bianco White wine (preferably a
Soave)
By the way, ignore the
limone (lemon) in the photograph. I got a bit too enthusiastic, when I was grabbing things from the fridge!
First I prepared the spaghetti in the normal way, making sure it was
al dente and adding a big lump of unsalted butter to give it a slightly oily taste and stop it sticking to the pan. I try to keep my spaghetti in boiling water for as short a time as possible and let it continue cooking in its own steam, with the water removed, when I take it off the heat.
 |
| Spaghetti with unsalted butter |
 |
| Shallot & garlic with chilli powder |
Next I fried the garlic and shallots until they had softened, adding the chilli powder to give it a bit of a kick. Chilli is not something I would normally associate with Italian cuisine, but I think the food in Venice is a little bit spicier, which makes sense, considering Venice built its vast fortunes on the spice trade.
After this I added the scallops, prawns and white wine with chopped parsley. I simmered the dish for about 20 minutes, until the liquid had boiled off a little bit, then I served with the spaghetti.
 |
| Spaghetti alle Vongole |
Risi e Bisi
On Sunday morning, I turned my hand to
Risi e Bisi or 'peas and rice', a very traditional Venetian dish which is associated with spring time. It's a kind of soupy risotto - but it shouldn't be very liquidy. It reminded me a lot of the Caribbean dish I love 'peas rice', except without the spices. It was dead easy to make. Here are the ingredients I used:
 |
| Ingredients for Risi e Bisi |
Prezzemolo Parsley
1 cipolla 1 onion
Pancetta tagliata a dadini Diced pancetta
Brodo vegetale Vegetable stock - it's good to make this from the pea shells, but I cheated with Oxo cubes!
Parmigiano-Reggiano (the original Parmesan cheese)
Burro non salato Unsalted butter
Arborio Risotto Risotto, short-grain rice - you'll find this in any supermarket in the UK
Piselli Peas - I used the frozen variety (cheating again!)
To start with I fried the chopped onion, then added the diced pancetta. I let both of these cook for about 5 minutes, then added the rice. I know some people struggle with risotto, but I think the key is extreme vigilance. I covered the rice, onion and pancetta with vegetable stock, then topped up after a few minutes, when the risotto had absorbed the liquid, then topped up again, added the peas, then topped up again . . . and again, until I had added about a litre of vegetable stock to the pan.
 |
| Fry the onion and pancetta |
 |
| Add the risotto, stock and peas |
 |
| Add the parsley |
 |
| Add unsalted butter |
 |
| Add Parmesan cheese |
 |
| Risi e Bisi |
To be honest, I probably added a little bit more stock than I normally would for a risotto, but I wanted to stick to the Venetian version of this dish, which is meant to be a little bit soupy. Finally I added the chopped parsley, then the unsalted butter, then the parmigiano and served with thin slices of ciabatta, with the creamy asiago cheese!
Sgombri Affumicati in Umido
My plans to make
Anguille (Eel)
in Umido were scuppered by the fact that my local Waitrose didn't have any eel (shame on them!). I was really looking forward to cooking eel for the first time and it's
incredibly Venetian! Anyway, I had to improvise, so we had
sgombri affumicati (smoked mackerel) instead. I think
in umido translates into English as 'in humid', but I'm not entirely sure what that means! The ingredients I used were:
 |
| Ingredients for Sgombri in Umido |
Olio d'oliva Olive oil (a light one this time)
Passata di pomodoro Tomato passata (or concentrated tomato)
1 cipolla 1 onion
1 limone 1 lemon
1 spicchio di aglio 1 garlic clove
4 filetti di sgombro affumicato 4 smoked mackerel fillets
polenta
salvia sage
Vino bianco White wine
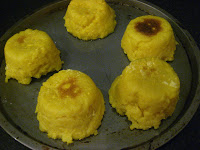
First I prepared the polenta. I'm never quite sure how to do this, so I boiled some water, then added enough polenta to thicken into a sloppy paste. I absolutely love polenta, but it can be unexciting, not to mention messy, when you serve it up. To make things a little bit more interesting, I used the juice of the lemon to add a bit of zest to the polenta. I then used a ramekin to mold polenta cakes - letting the polenta sit in the ramekin long enough to solidify, before turning each cake out onto a metal tray I use for cooking pizzas. Once I had used up all the polenta in this way, I grilled the cakes, which helped harden the exterior, but left the polenta still soft and steamy inside. Yum yum!
 |
| Tomato passata and Polenta |
 |
| Making polenta cakes |
 |
| Grilled Polenta cakes |
I also prepared the tomato passata by heating it in a small saucepan, adding a glassful of white wine to give it a more liquidy texture and keeping it on a low heat until I was ready to add it to the fish.
Finally I fried the onion until it softened, added the smoked fish until it was heated through and starting to bubble a little bit. Then I added the lemon rind, then the chopped sage. When the mixture had cooked through, I poured over enough of the tomato passata to cover everything, let it come to boiling point, then reduced the heat and simmered for about 15 minutes.
 |
| Fry the onion and smoked fish |
 |
| Add the lemon rind |
 |
| Add the parsley |
 |
| Add the tomato passata |
I served with the grilled polenta cakes, a couple of slices of ciabatta and the delicious Valpolicella.
Why not give this a try at home - if I can do it, anyone can, believe me!
 |
| Sgombri Affumicati in Umido |
Image credits:
The image of the flag of Veneto was provided copyright-free on Wikimedia, the original image having been supplied by wikuser Vajotwo with this derived version being added by wikiuser Flanker - you can see a more detailed description of this image at
http://en.wikipedia.org/wiki/File:Flag_of_Veneto.svg
All photos of the food were taken by me. Please feel free to reuse these images under the Creative Commons License, Attribution Share Alike - preferably with a link to this blog!